HOW – TO – GUIDES
HOW TO MEASURE.
How To Properly Measure Windows for a SLIP™.
The first step in ordering the Slim Line Insulating Pane (SLIP™) system is providing us with an accurate measurement. This is potentially the most important step in the SLIP™ process. It allows us to build and provide you with a properly fitted product that will look and perform optimally for many years. While we have provided detailed measuring instructions, we recommend that you work with a local contractor or installer to ensure that measurements are accurate.
NOTICE: You only need to measure for SLIPs if you intend to self-install. Please review all information on the “How-To Guide” page to determine if you have the appropriate skill level and tools available for self-installation.
“Daylight Size”.
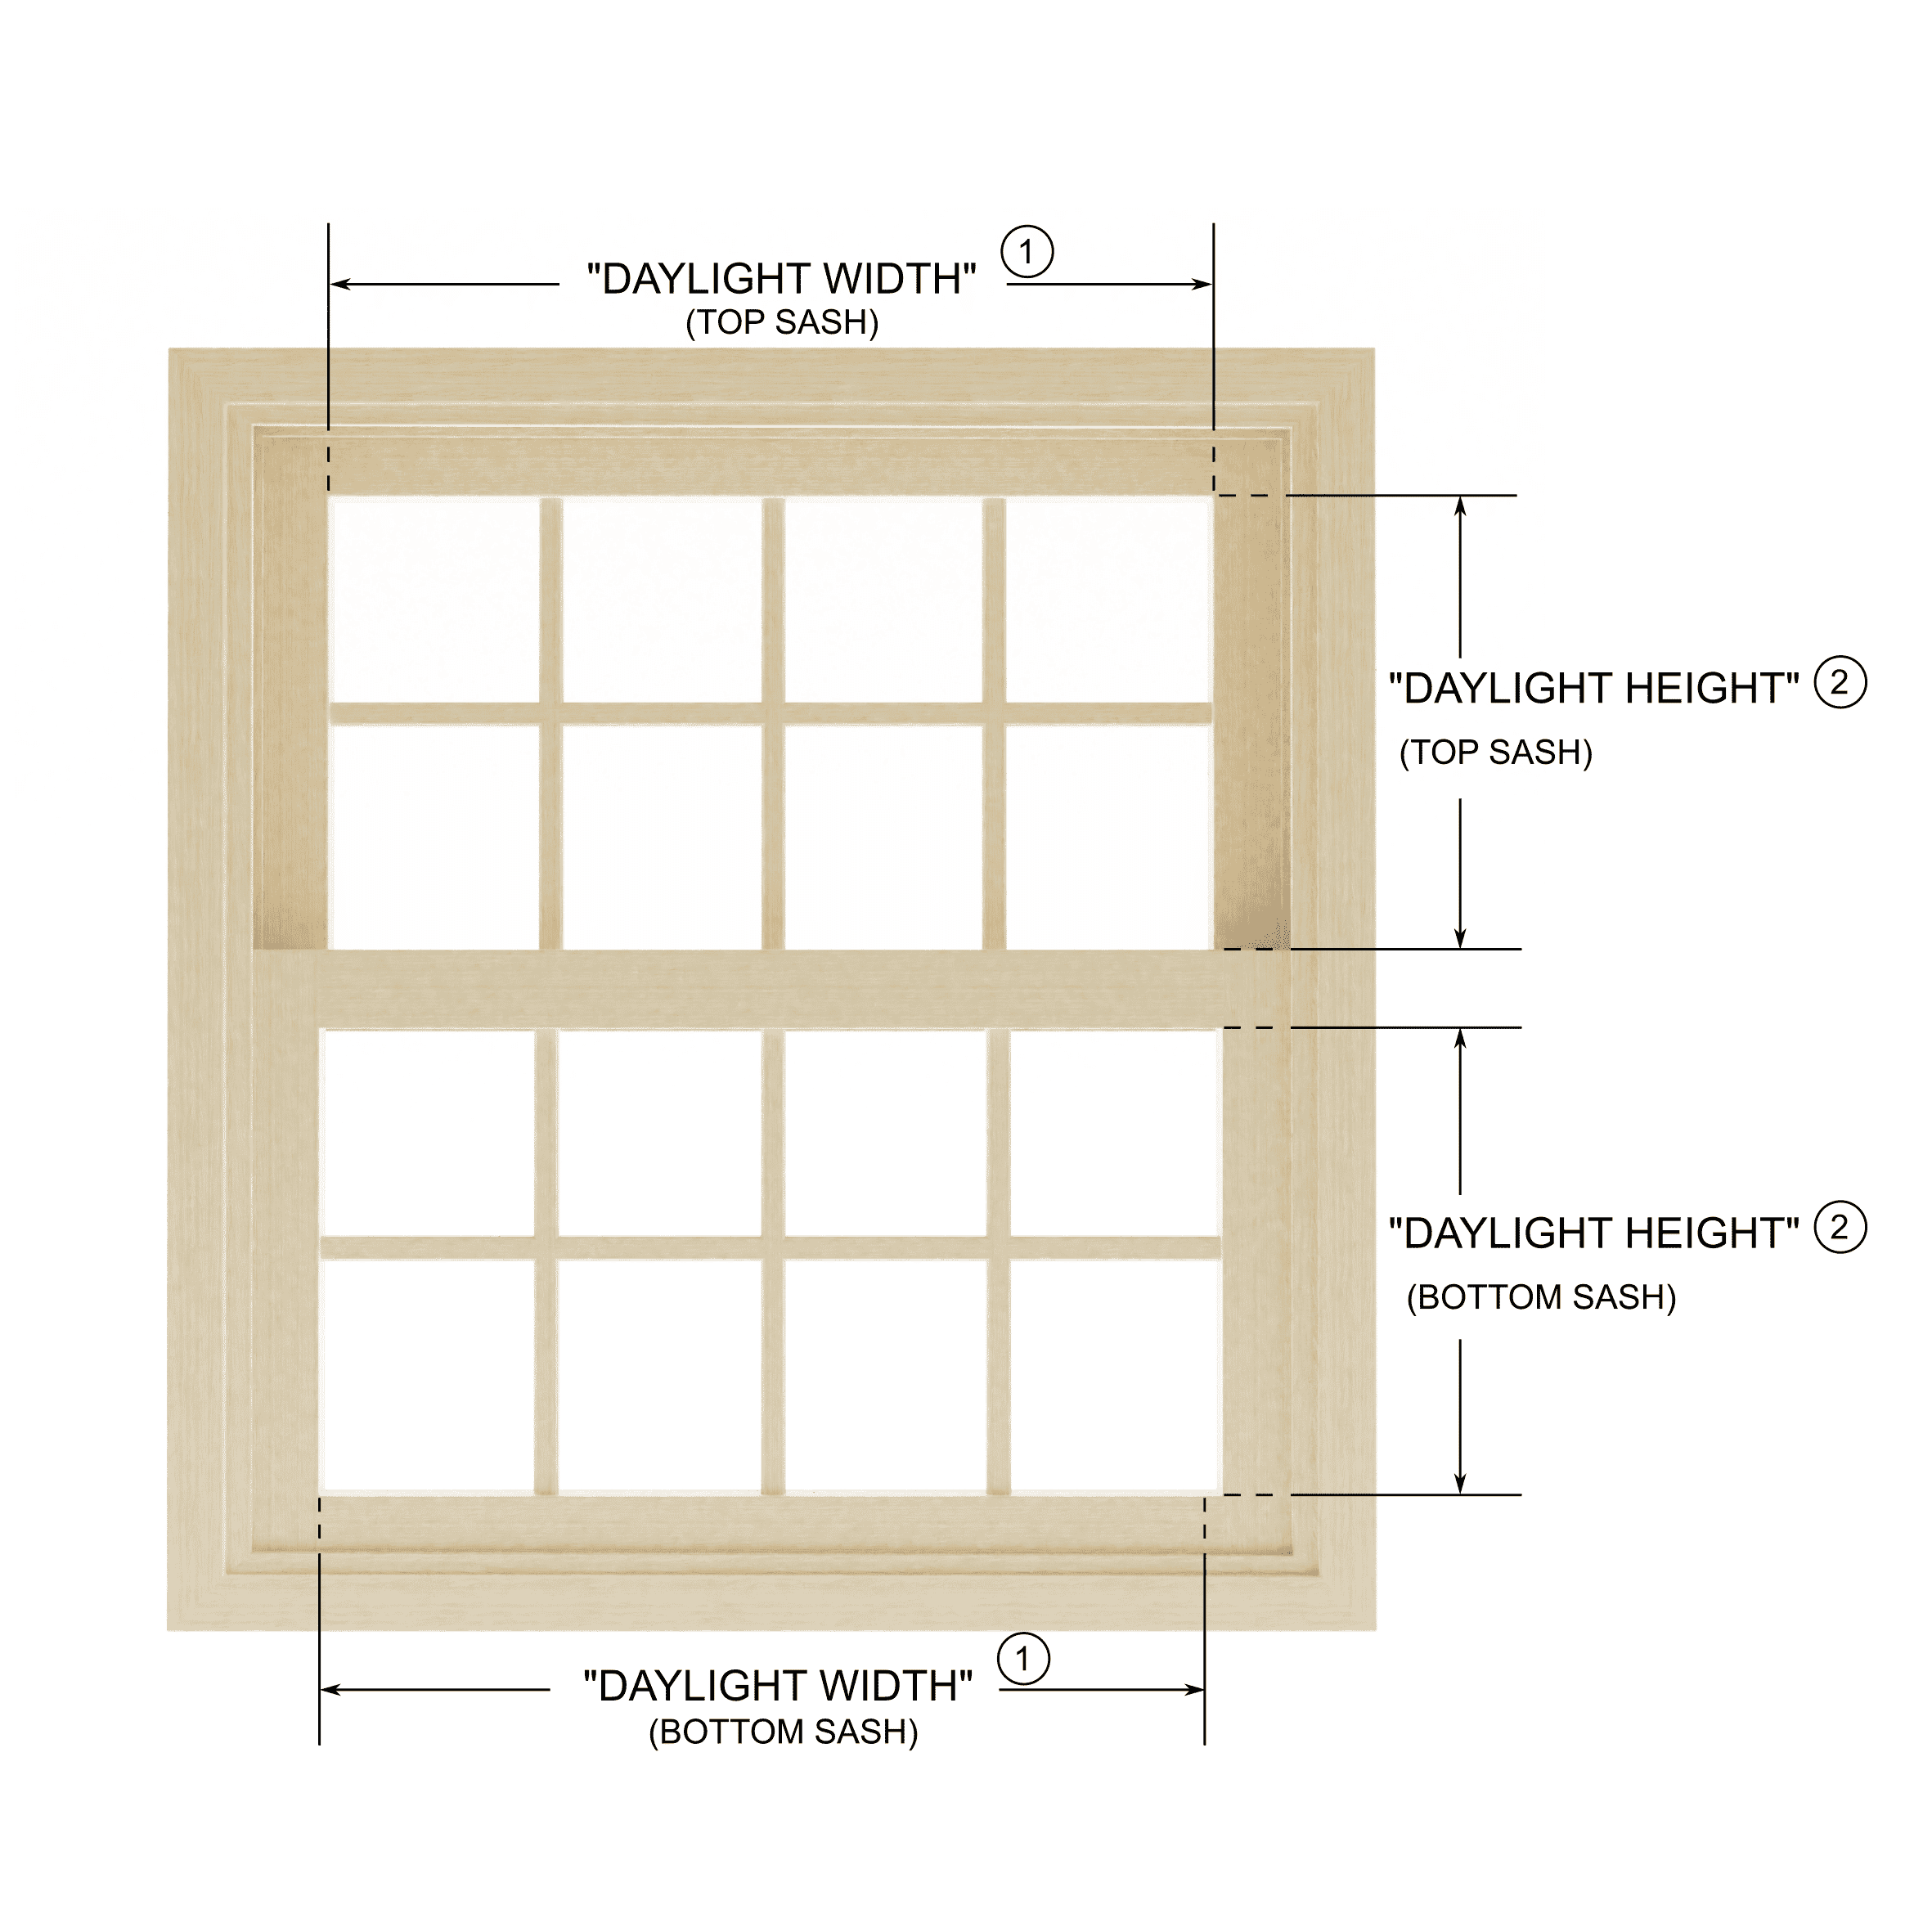
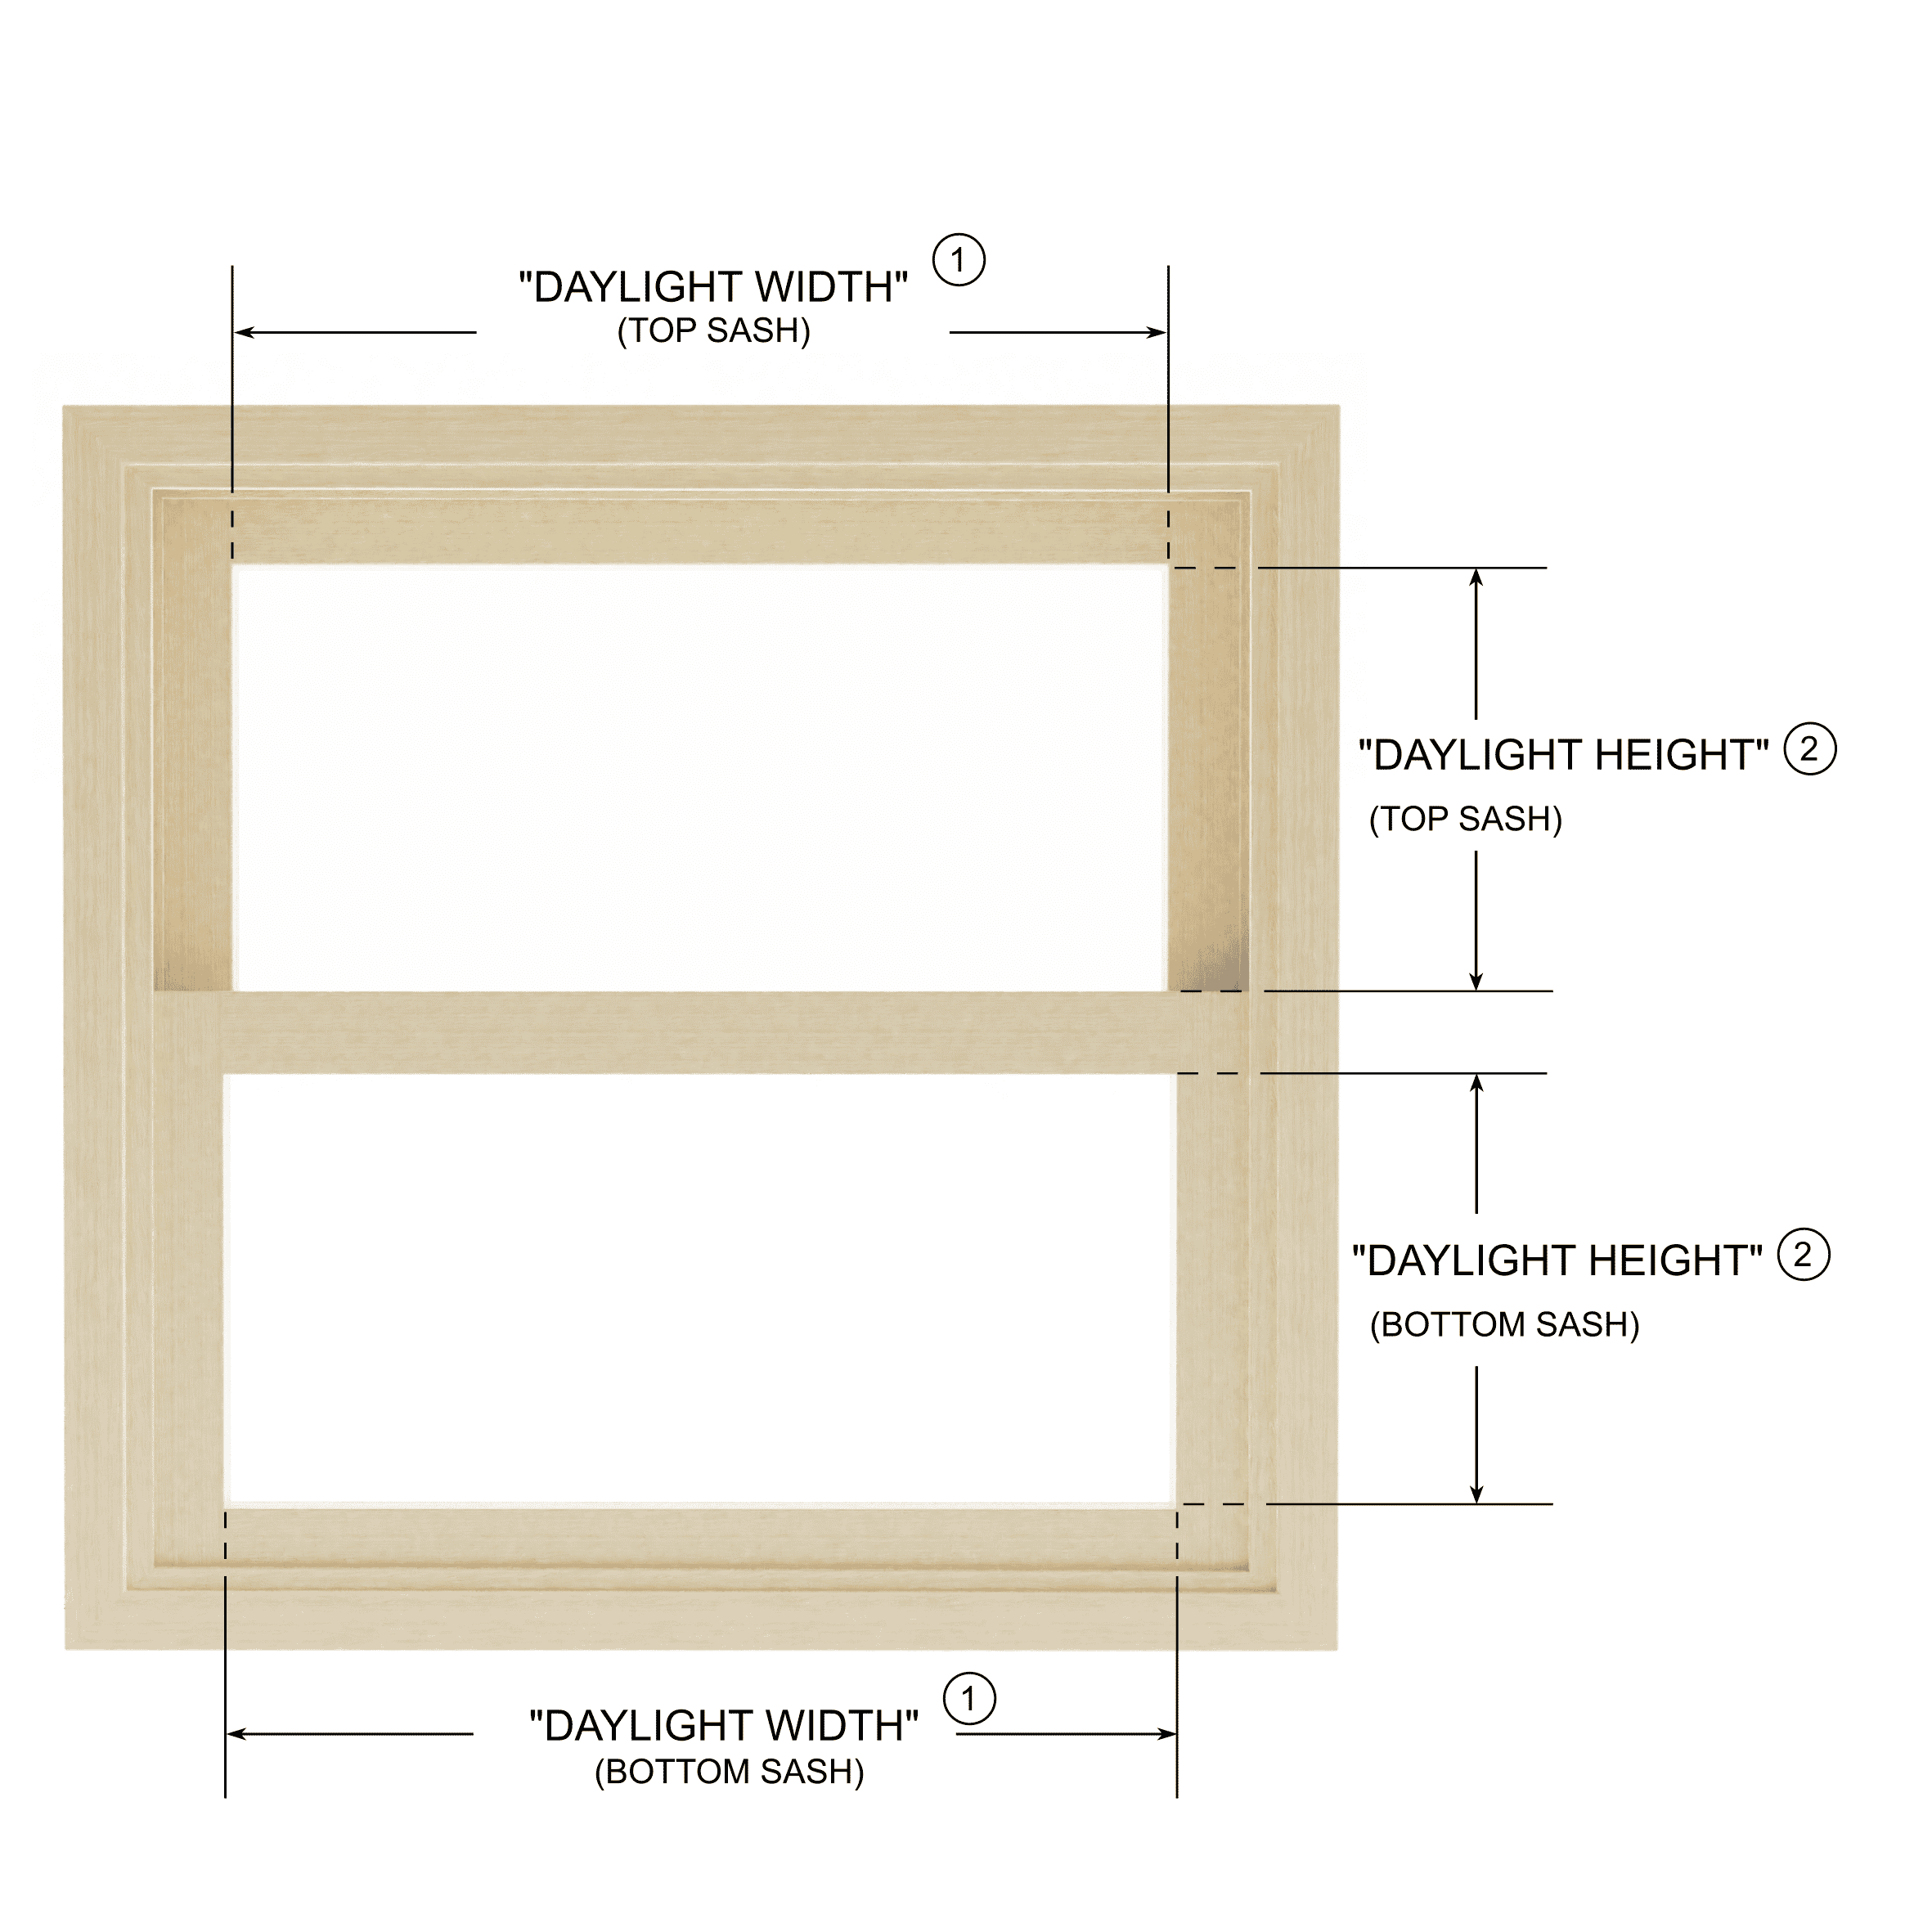
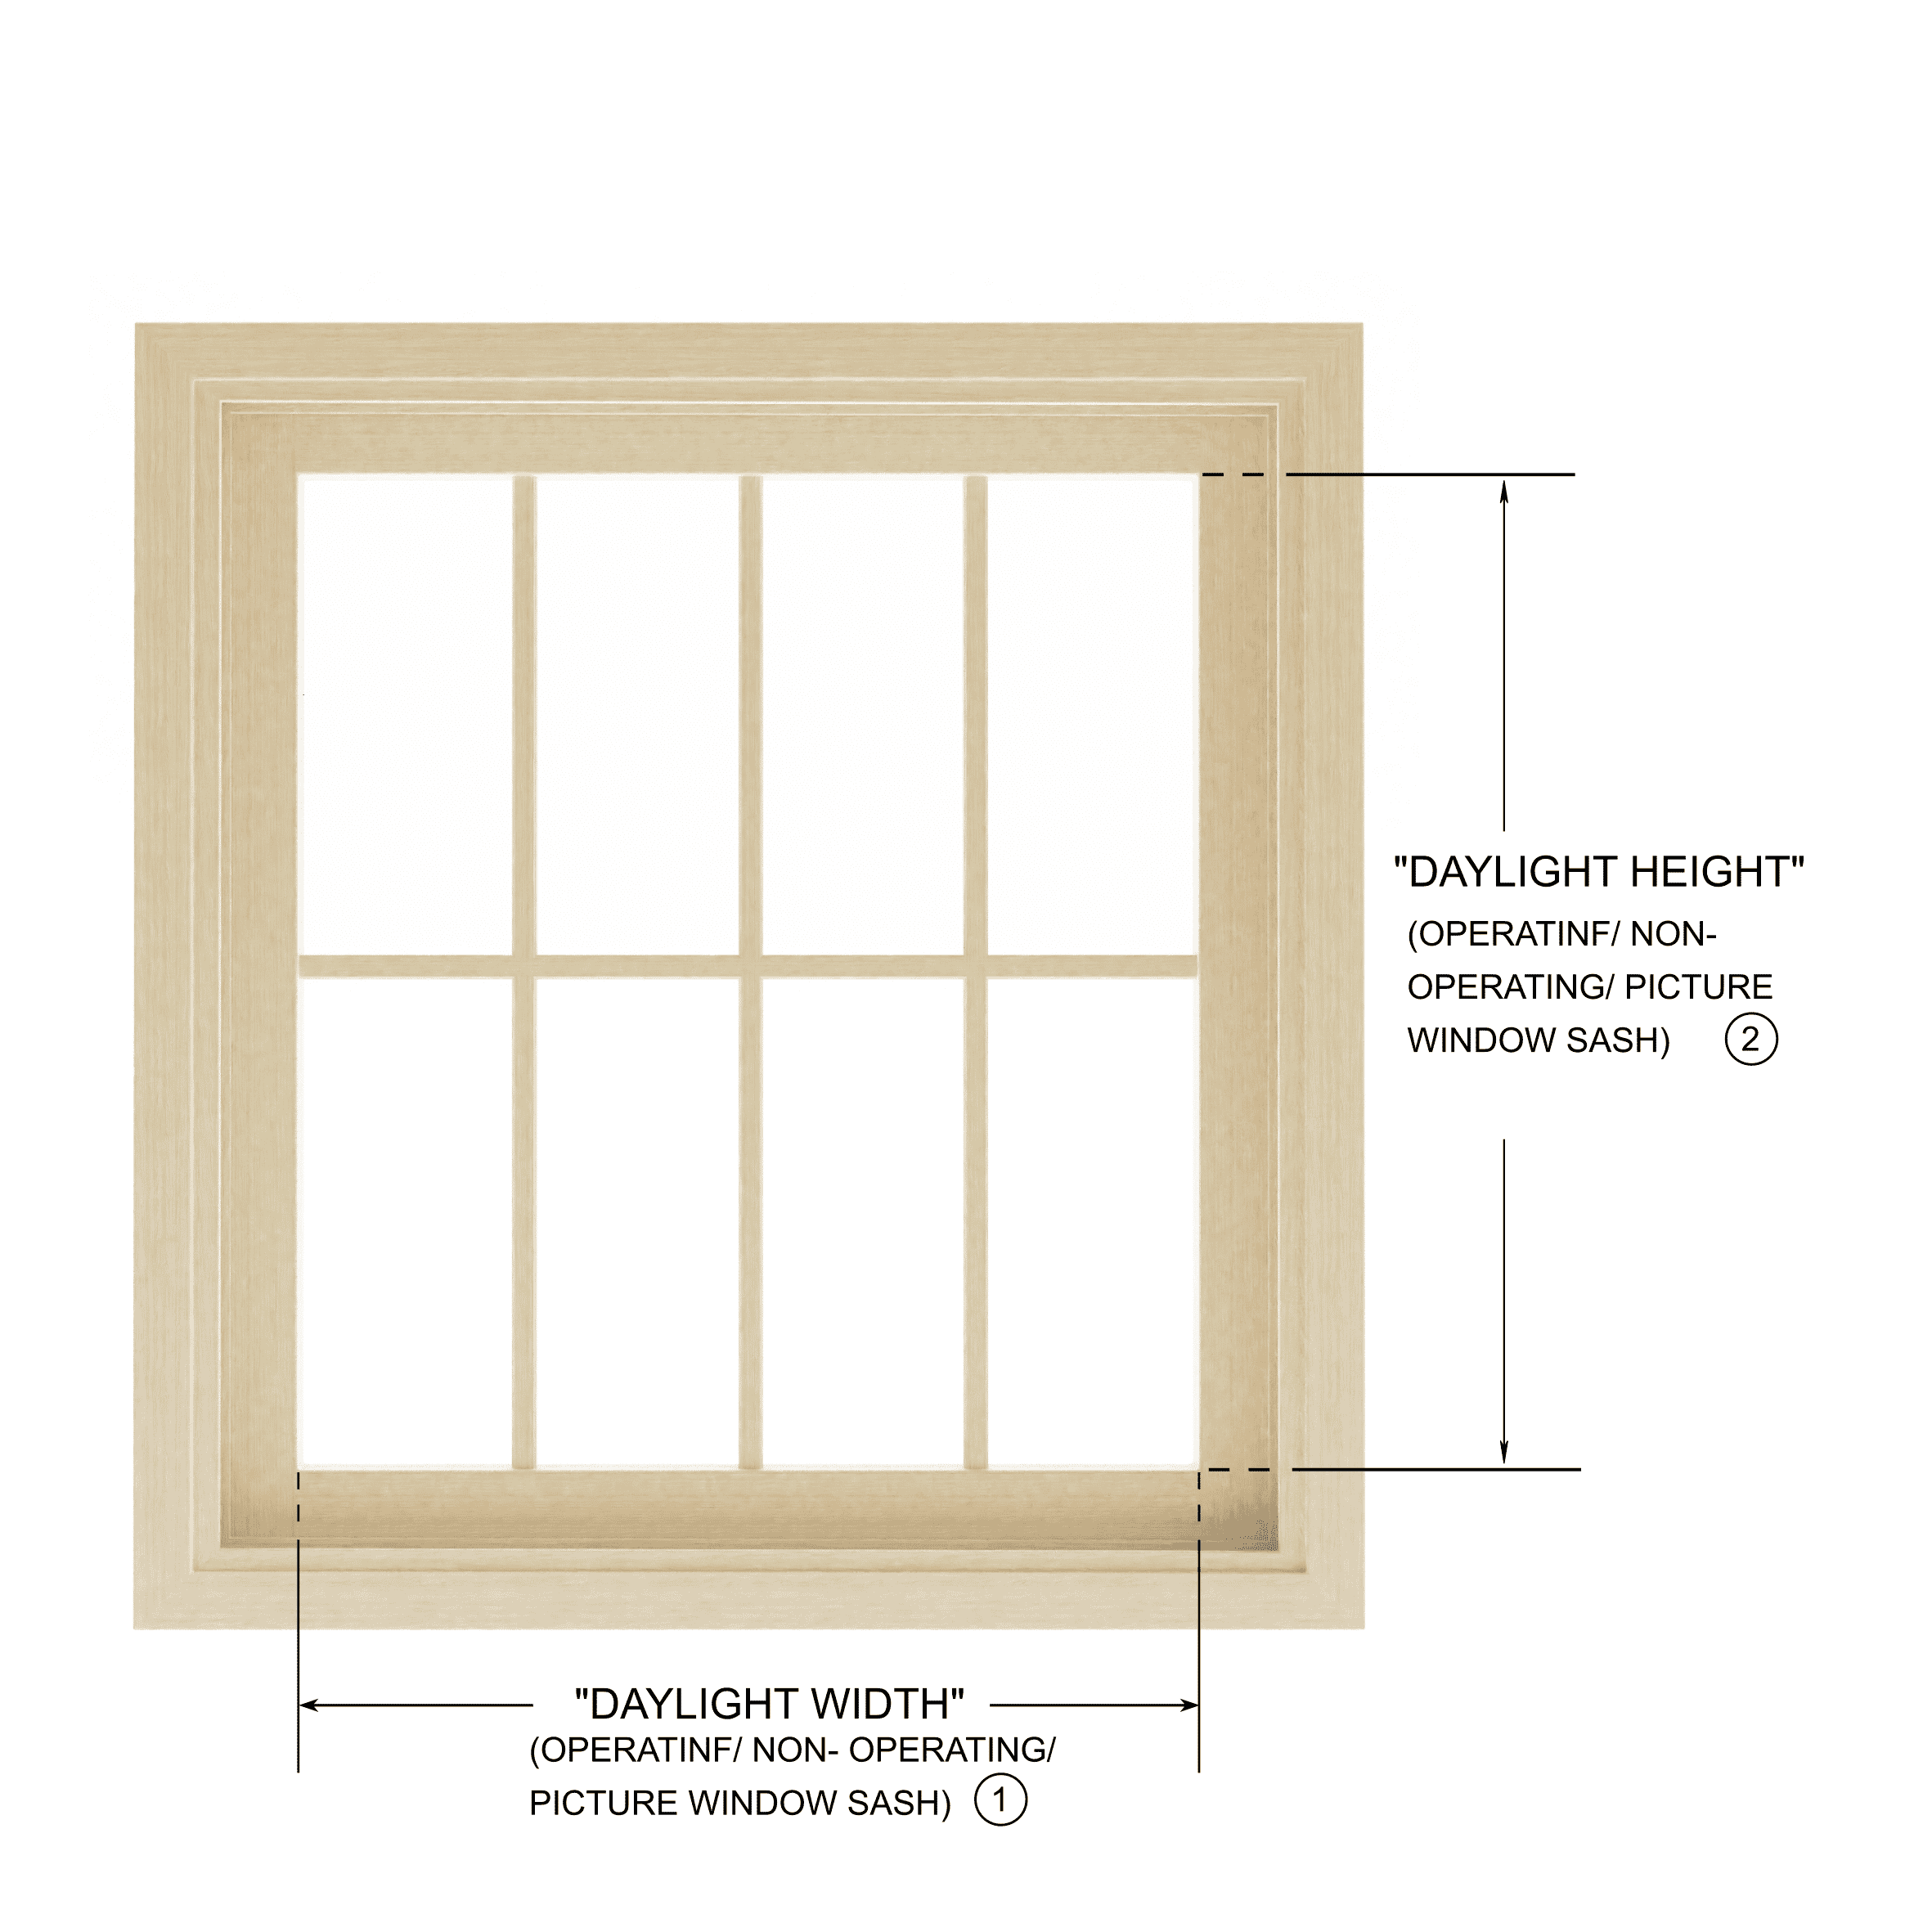
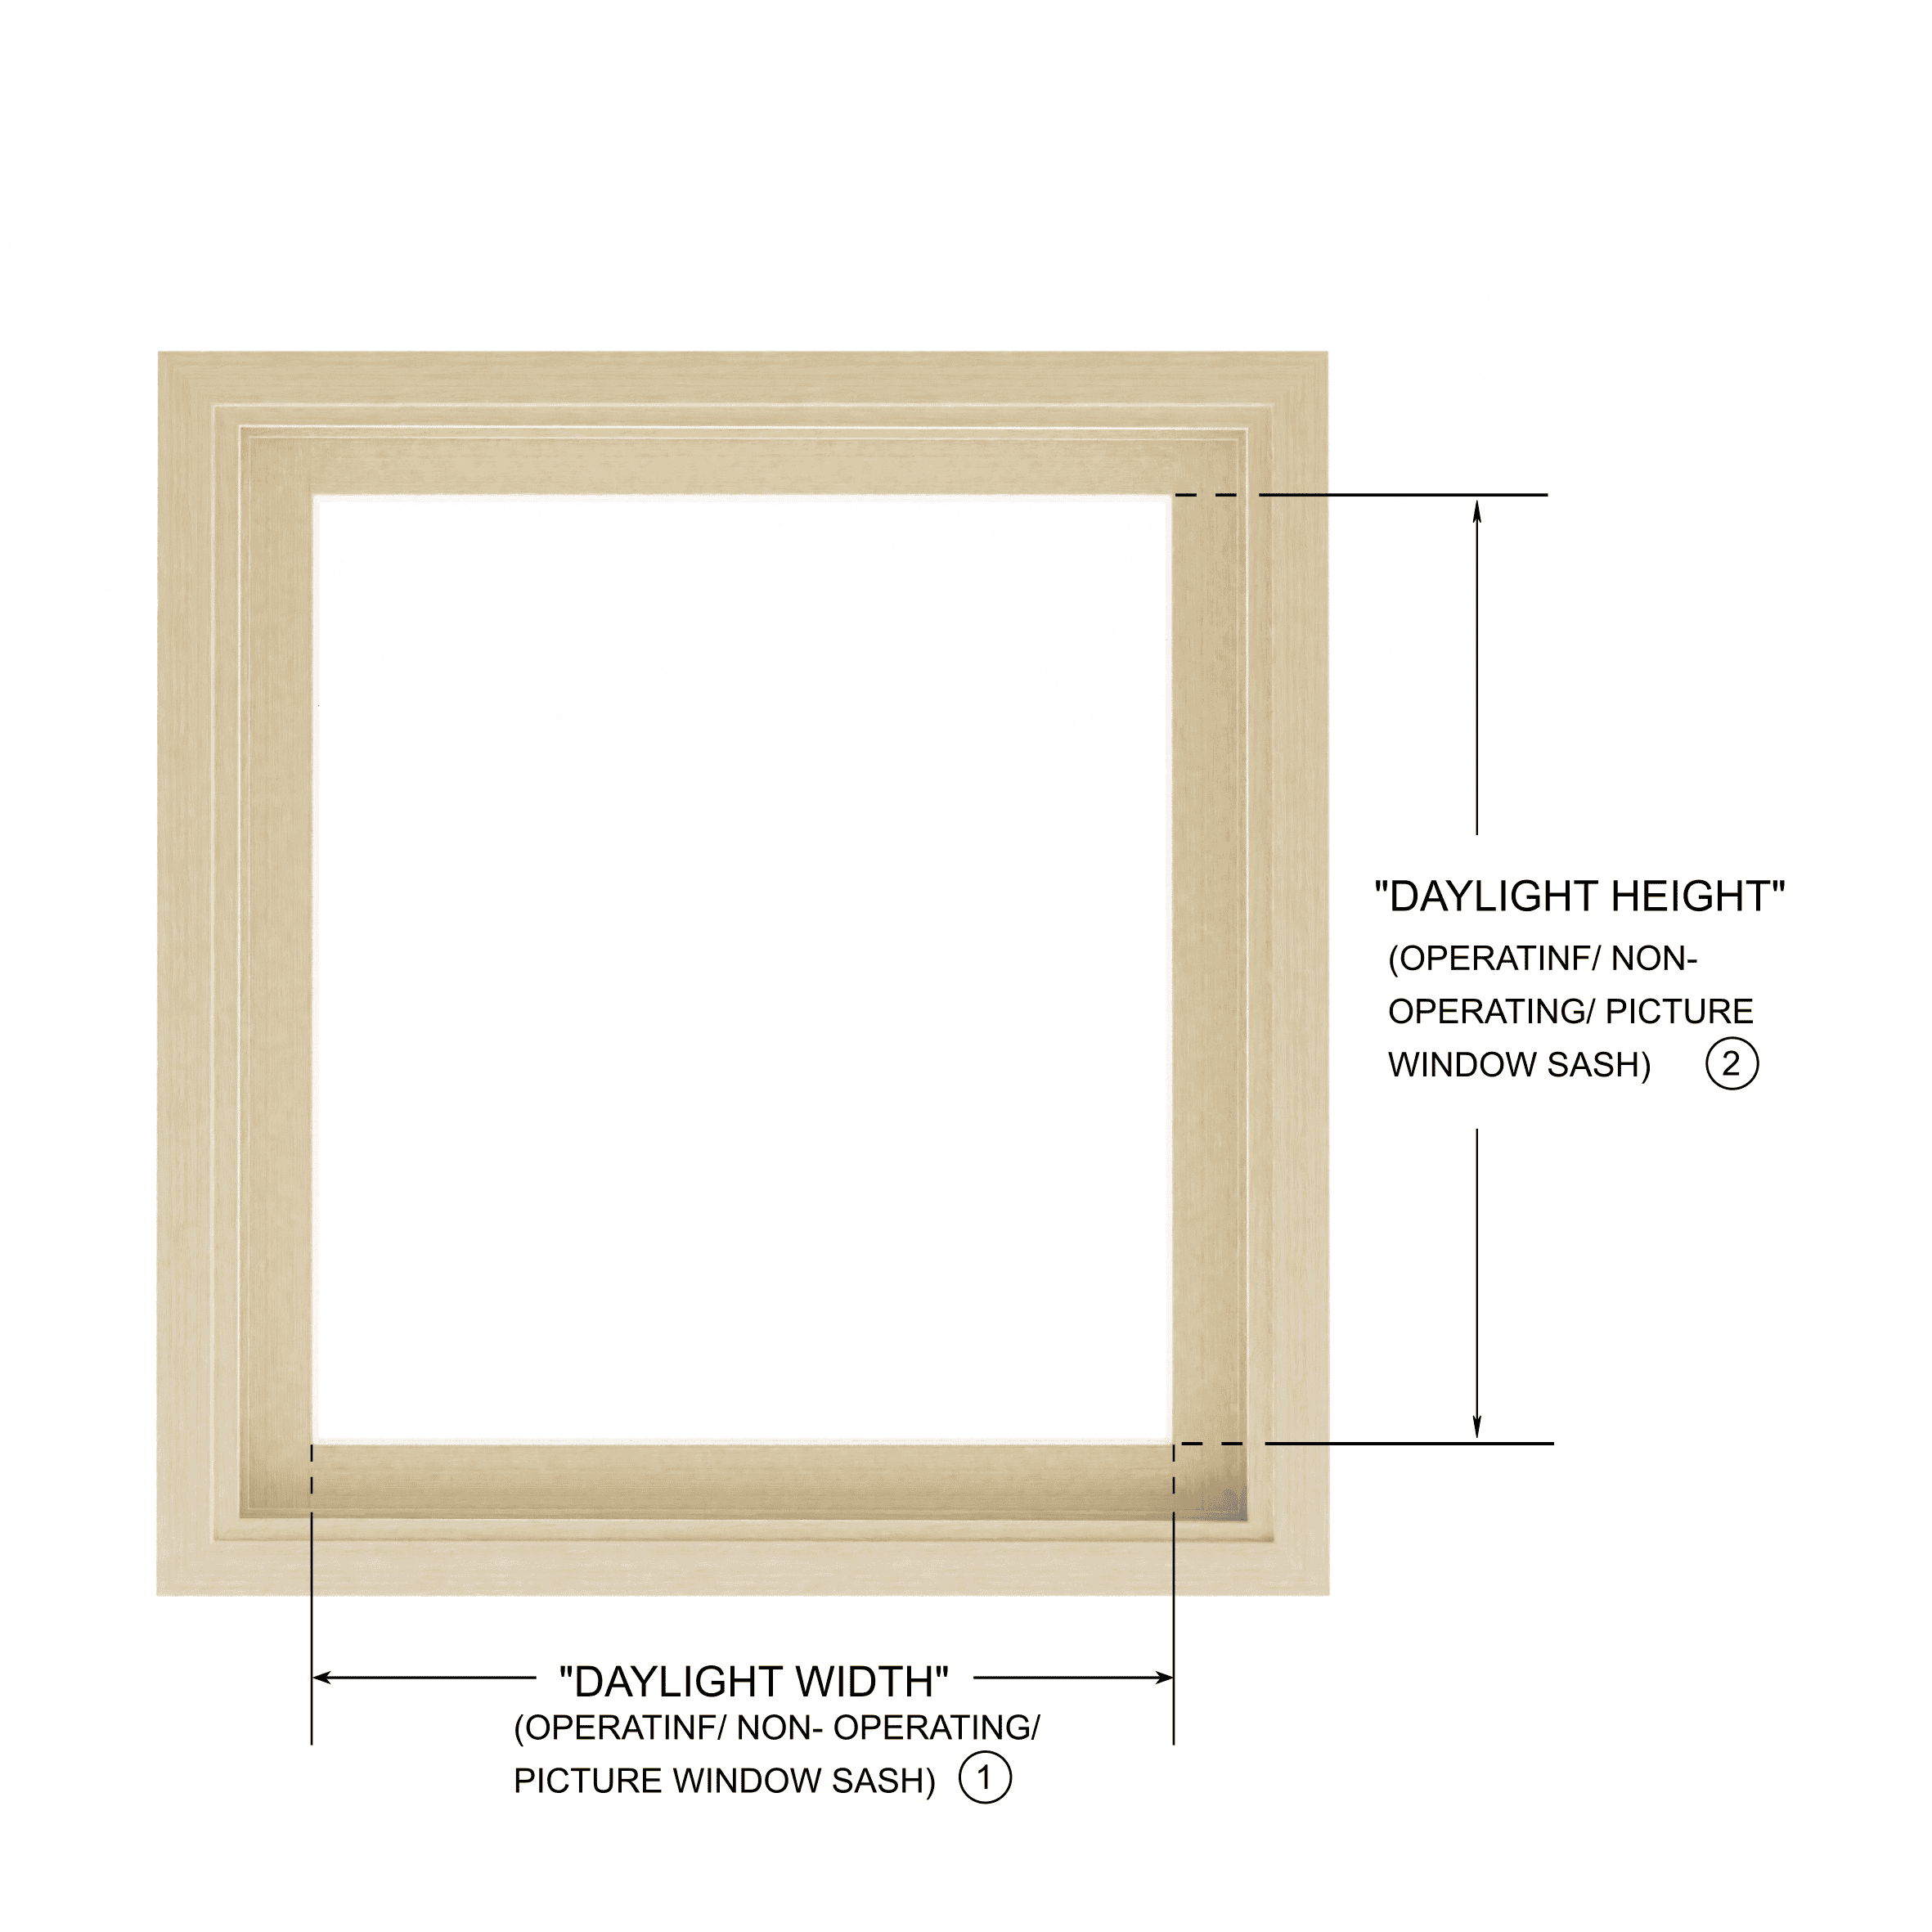
The measurement required is what we call the “daylight size.” It is essentially the overall measurement of the width and height of where the glass meets the wood. We understand that there are many types of vintage sash with a variety of glass configurations. However, the process for obtaining the daylight measurement is identical regardless of the sash/glass setup.
Put your tape measure to the edge of the sash where it meets the far outside edge of the outermost glass pane (for multi-light configurations) or where the profile edge of the sash meets the outside edge of a single-light sash configuration. While holding the tape measure end to this point, drag the tape measure across all glass panes for multi-light configuration or across the entire pane for single-light configurations, and read the measurement simultaneously on the opposite side of the sash. For most vintage sashes, this measurement ends with the fraction 5/8”, but this is not always the case. The same process is repeated for the daylight height. The first measurement we receive must be width, followed by height. These measurements ultimately decide the shape and size of each SLIP™, as well as the hidden balance type for double-hung.
For double-hung windows, this process needs to be repeated for both top and bottom sashes. They are not always the same size. Repeat this process for all windows you wish to order, and install the SLIP™.
Converting from “Daylight Size” to the overall size of the SLIP™.
When going from the “daylight size” to the overall SLIP™ size, we add additional material sizes to daylight width and height to account for the glazing sealant and the size of the SLIP™ aluminum. Your estimate will show both the customer’s given daylight measurements and the overall conversion size.
Double-Hung:
Overall Conversion
- Top Sash — Add 2 ½ to the daylight width and height.
- Bottom Sash — Add 2 ½ to the daylight width and 1 5/16 to the height.
Note: On a double-hung or single-hung window, a bottom SLIP does not have top aluminum extrusion. This is due to the bevel on the meeting rails. Please watch the full installation video to see more.
Casement/Picture Window/French casement:
Overall Conversion
- Add 2 ½ to the daylight width and height.
NOTE (Out of Square/Sagging Windows): Sometimes windows or sash may be out of square. SLIPs can still be installed on an out-of-square sash. When the sash is out of square, you’ll notice that the daylight will have different measurements at different sash sections. You must take the largest measurement you get from the daylight for your SLIP to fit over the entirety of the glazing. If you requested weatherstripping, we use 1/8″ weatherstripping. The weatherstripping won’t be as effective if a 1/8″ gap around the sash and the frame doesn’t exist.
REDUCE YOUR WINDOW ENGERY BILLS BY UP TO 72%
Reach out & we’ll answer any questions you have to help you get started.


